In this article we cover how to set up a REST web API on your Pi using Flask, and how to use that it from any remote network to control two LEDs attached to GPIOs on your Pi.
This project has enormous scope for further work. The same setup will work for remotely controlled robotics, sensors and telemetry applications.
And Lego. :-)

Prerequisites
We'll assume that you have your Pi powered up, connected to the internet and have Dataplicity installed. If you need some help to get up to speed, see Getting started with Dataplicity.
Make sure to free up port 80
If you have been going through other tutorials for wormhole you might have an application or a service already running on port 80. Make sure that nothing is running on port 80 prior to following the instructions in this article.
Connect the LEDs to your Raspberry Pi GPIO
Assembly your LEDs on a breadboard as shown in schematic below:
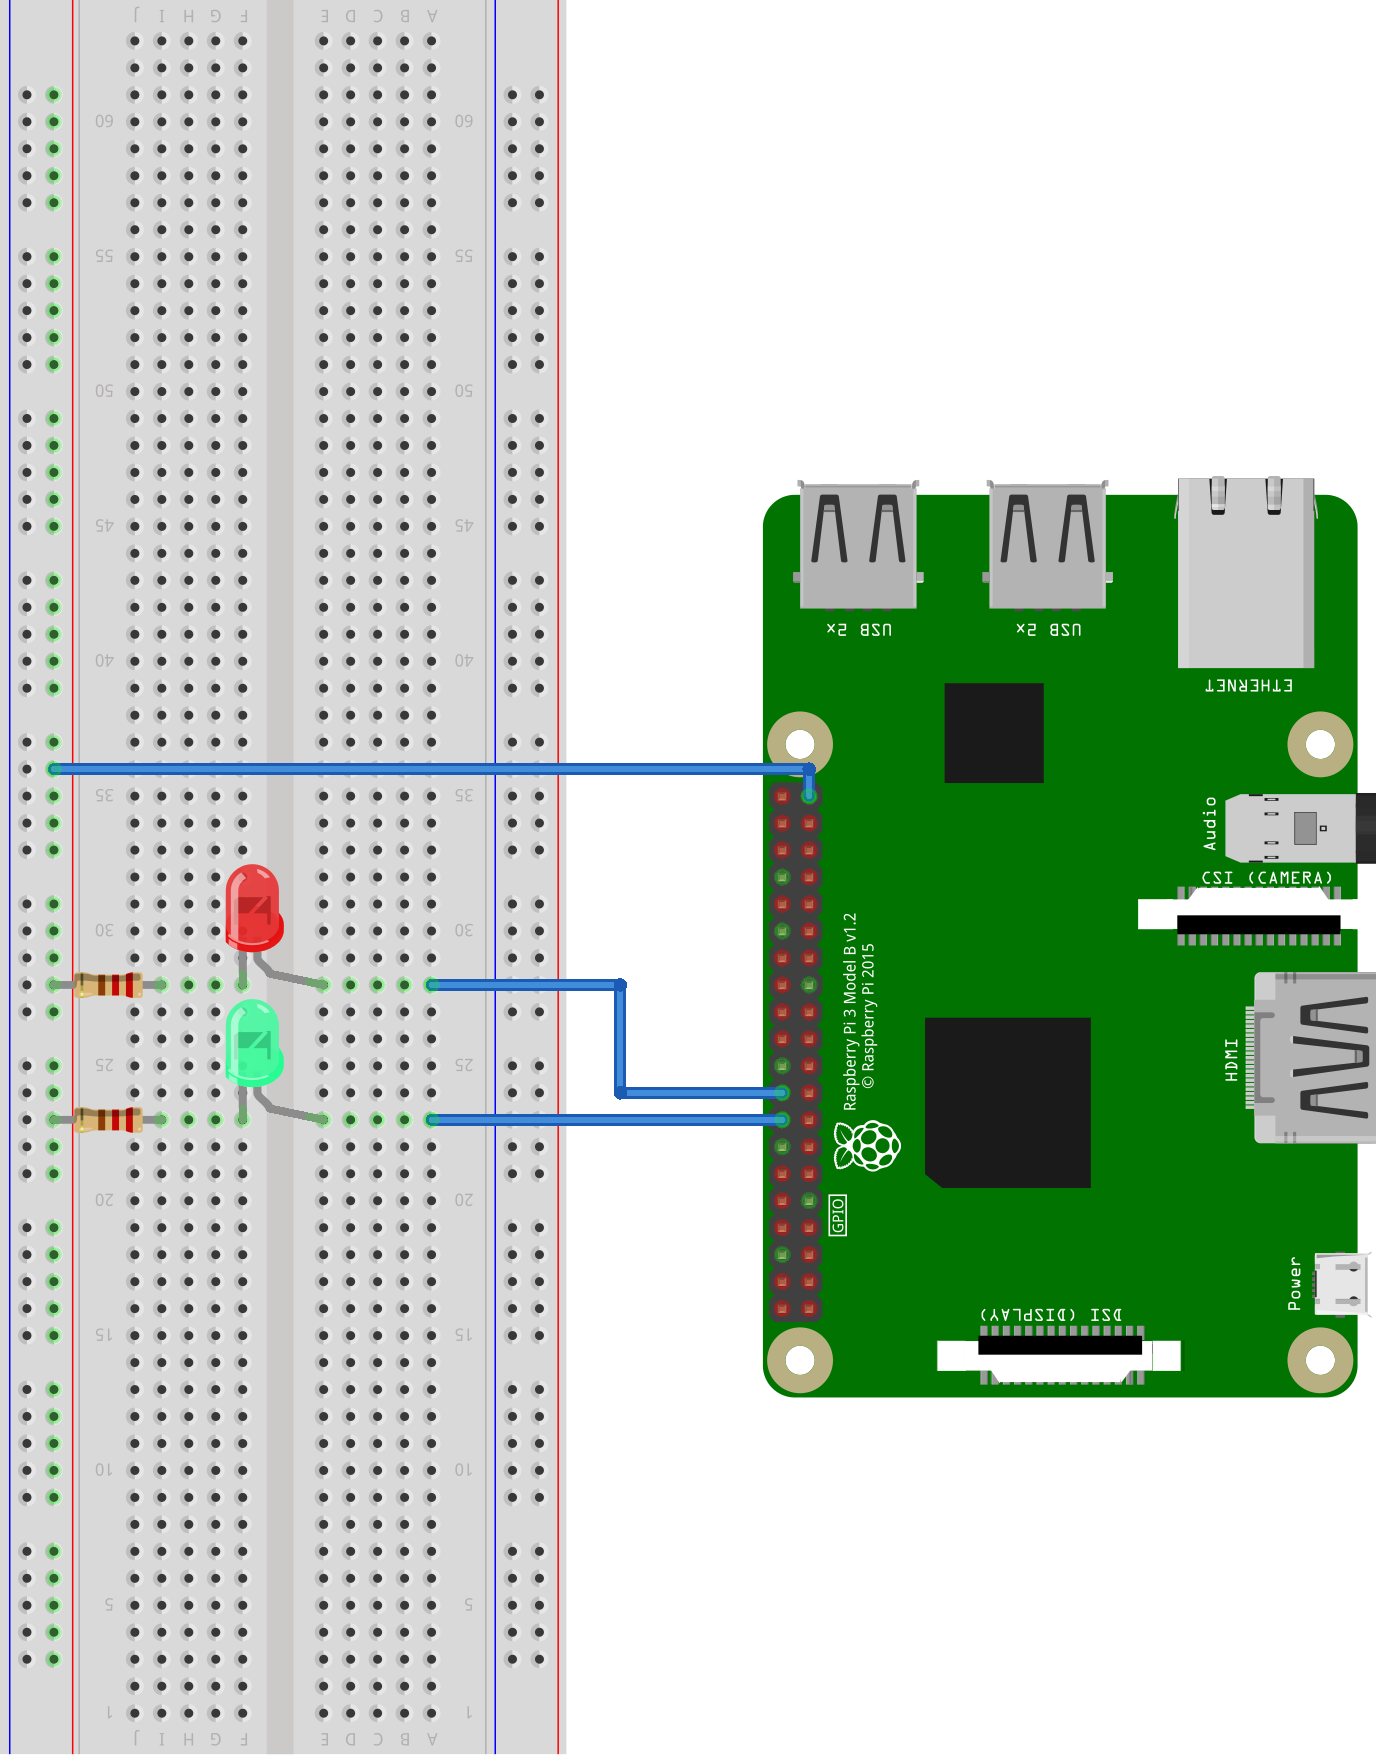
LED Schematic
Note that in this example we have chosen to connect our LEDs to pins 16 and 18 on the Raspberry Pi.
Install Flask
To get our web server set up we need to install two Flask packages:
- Flask: The main framework for the Flask framework
- Flask-API: An extension to Flask that supports development of REST APIs
sudo pip install Flask
sudo pip install Flask-API
Create the Flask application
Create a new file called fl-app.py with your favourite editor (eg nano).
sudo nano fl-app.pyCopy the script below into that file.
#!/usr/bin/python
from flask import request
from flask_api import FlaskAPI
import RPi.GPIO as GPIO
LEDS = {"green": 16, "red": 18}
GPIO.setmode(GPIO.BOARD)
GPIO.setup(LEDS["green"], GPIO.OUT)
GPIO.setup(LEDS["red"], GPIO.OUT)
app = FlaskAPI(__name__)
.route('/', methods=["GET"])
def api_root():
return {
"led_url": request.url + "led/(green | red)/",
"led_url_POST": {"state": "(0 | 1)"}
}
.route('/led//' , methods=["GET", "POST"])
def api_leds_control(color):
if request.method == "POST":
if color in LEDS:
GPIO.output(LEDS[color], int(request.data.get("state")))
return {color: GPIO.input(LEDS[color])}
if __name__ == "__main__":
app.run()How it works
The script above:
- Configures GPIO pins 16 and 18 as outputs to match our wiring above
- Configures the main Flask application.
- Maps "routes" (allowed HTTP methods) to their corresponding functions.
In this example, we are using two routes. The first "root" ("/") route responds to HTTP GET request by serving instructions for use of the API. The second "/led/
- On GET: return the current state of the LED (ie ON or OFF)
- On POST: change the state of the LED to ON or to OFF
Run Flask
To run our Flask application, we must first set an environment variable to tell Flask which application to run.
export FLASK_APP=fl-app.pyWe then use the command below to run flask on port 80.
sudo -E flask run --host=0.0.0.0 --port=80The parameters above are as follows:
-
-EWhen runningsudo, preserve environmental variables (including FLASK_APP). This is needed so FLASK_APP is visible in the elevated environment. -
flask runruns Flask, which in turn starts the FLASK_APP we've set in the environment. -
--host=0.0.0.0means that fl-app.py will run on every available IPv4 interface (typically "eth0" and/or "wlan0" on a Pi).
You may wish to restrict Flask to listening on localhost (127.0.0.1)
For ease of testing, in this example we set Flask to run only on all available interfaces. However, depending on the nature of your application, you may wish to ensure that your webserver is available only via Wormhole. Should you wish to do this you could simply change "0.0.0.0" in the above command to "127.0.0.1".
After the server starts, you should see this:
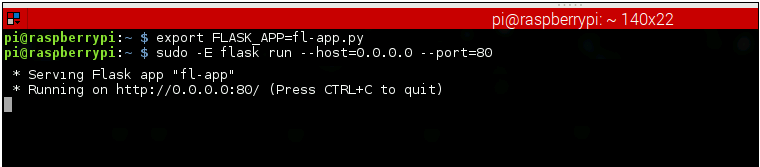
Running flask web server
Interacting with the API
You can use either your terminal or a web browser to interact with the running REST API.
If you haven't got Dataplicity installed yet, now is the time. At this point you need to enable Dataplicity Wormhole to make this REST API available anywhere. If you need some guidance, see Host a website from your Pi, though note that you'll want to skip the bit about installing a webserver as we are already running Flask here.
Using a web browser
The Flask-API framework provides a beautiful self-documented API plus an interface for testing your queries.
If we go to our Wormhole URL, i.e. https://, you should get the following page.
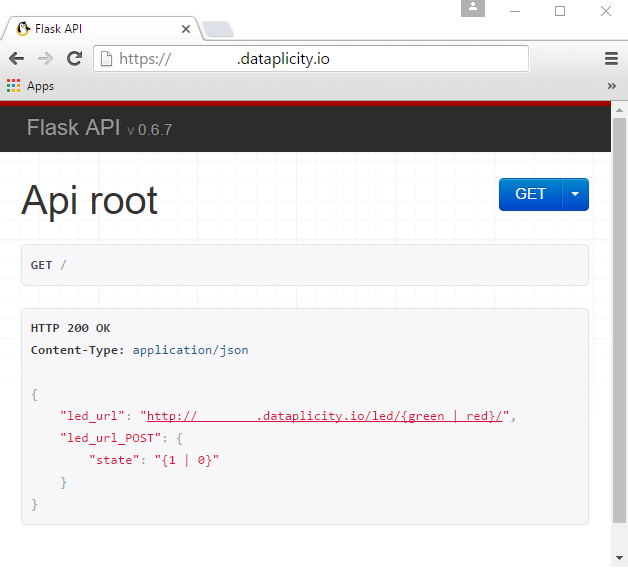
Testing REST API in browser
From here we can view and set the LED states using a JSON formatted query. Like so:
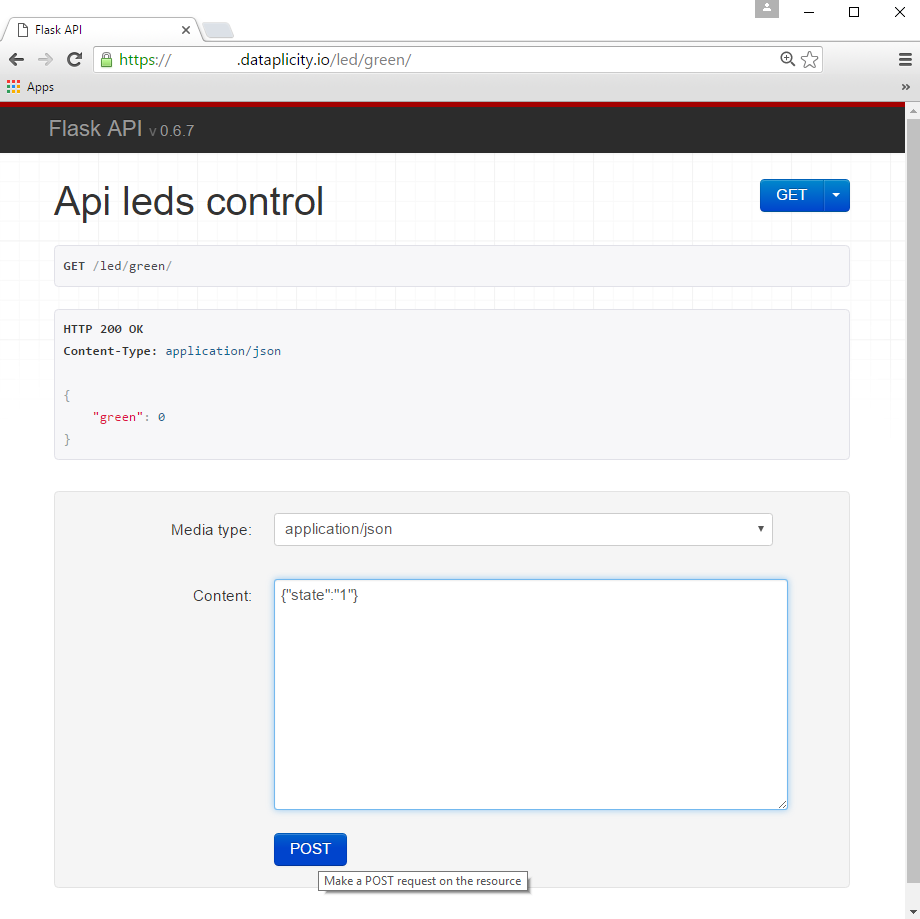
Testing REST API in browser
Using a terminal
Using a Linux terminal (or similar on Mac and Windows), we are able to control the GPIOs (LEDs) remotely with simple command line web requests.